Category: Cloud Server

  • How to restore the real IP address of the visitor if your web application is behind Cloudflare

    If your web application is behind Cloudflare and you try to access the IP address of the visitor in your application, it will always show Cloudflare IP addresses, to fix this, you need to replace the Cloudflare IP address with the real IP address of the respective visitor.

    Cloudflare IP addresses :

    First of all, you need to know the IP addresses of Cloudflare.

    How to restore the real IP of the visitor in the Nginx server:

    Add the following Nginx rules to restore the real IP addresses of the visitor.

    # Cloudflare IPv4 addresses  ( IPV4 addresses that you got from https://www.cloudflare.com/ips-v4 ) 
    set_real_ip_from 173.245.48.0/20;
    set_real_ip_from 103.21.244.0/22;
    set_real_ip_from 103.22.200.0/22;
    set_real_ip_from 103.31.4.0/22;
    set_real_ip_from 141.101.64.0/18;
    set_real_ip_from 108.162.192.0/18;
    set_real_ip_from 190.93.240.0/20;
    set_real_ip_from 188.114.96.0/20;
    set_real_ip_from 197.234.240.0/22;
    set_real_ip_from 198.41.128.0/17;
    set_real_ip_from 162.158.0.0/15;
    set_real_ip_from 104.16.0.0/13;
    set_real_ip_from 104.24.0.0/14;
    set_real_ip_from 172.64.0.0/13;
    set_real_ip_from 131.0.72.0/22;
    
    # Cloudflare IPv6 addresses ( IPV6 addresses that you got from https://www.cloudflare.com/ips-v6 )
    set_real_ip_from 2400:cb00::/32;
    set_real_ip_from 2606:4700::/32;
    set_real_ip_from 2803:f800::/32;
    set_real_ip_from 2405:b500::/32;
    set_real_ip_from 2405:8100::/32;
    set_real_ip_from 2a06:98c0::/29;
    set_real_ip_from 2c0f:f248::/32;
    
    real_ip_header X-Forwarded-For;

    If you have multiple domains in a single Nginx server, then you have to make sure that the rules are applied globally on all the sites in the server or if it’s a single site, make sure that the rules are applied only for that particular web application.
  • How to change ssh port and secure it by fail2ban in Linux server

    How to change ssh port and secure it by fail2ban in Linux server

    I use runcloud to manage most of my Linux servers, so i have given screenshots of runcloud servers. But you can follow the steps to achieve the same in any Linux server.

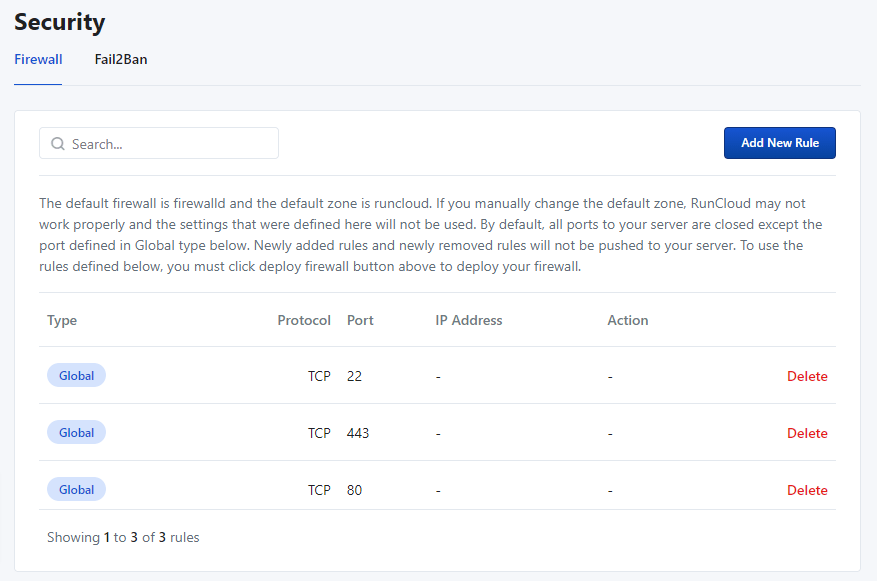
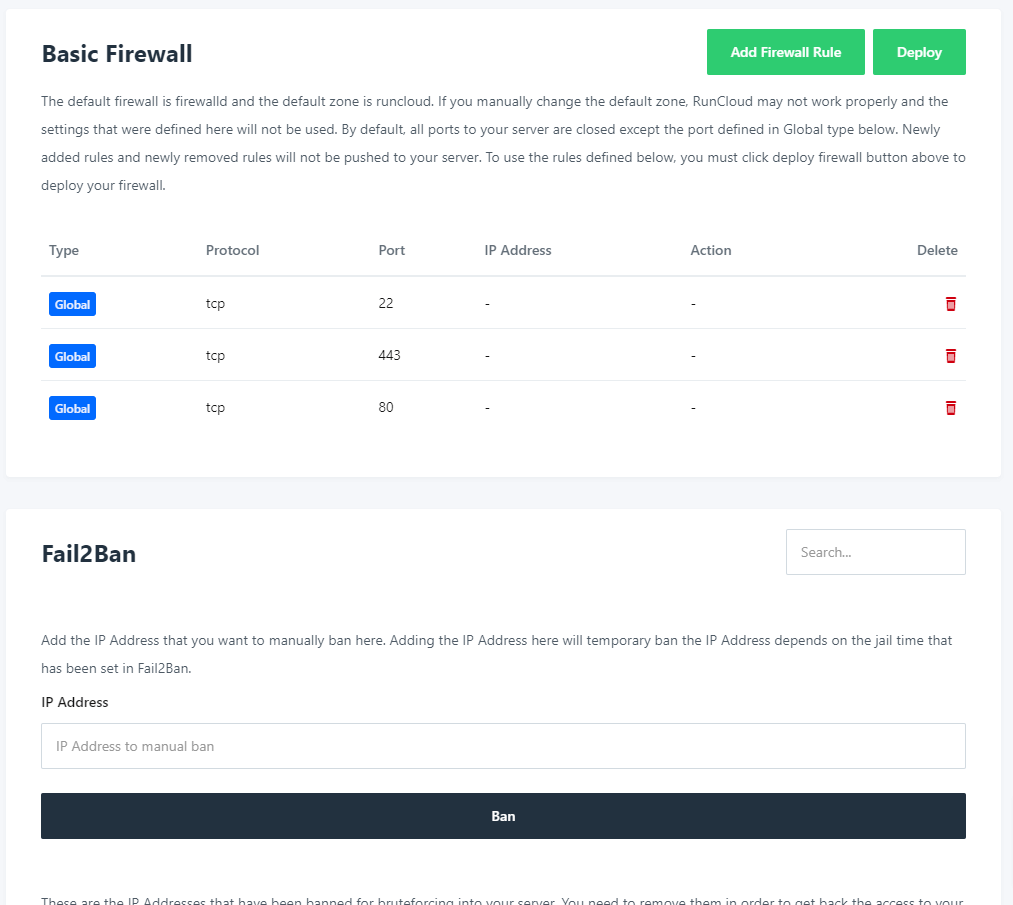
    By default, runcloud has ports 22 (ssh), 80(HTTP), and 443(HTTPS) open, and port 22 is secured by the fail2ban application.

    Runcloud Firewall Settings in old UI
    Runcloud Firewall Settings in new UI interface

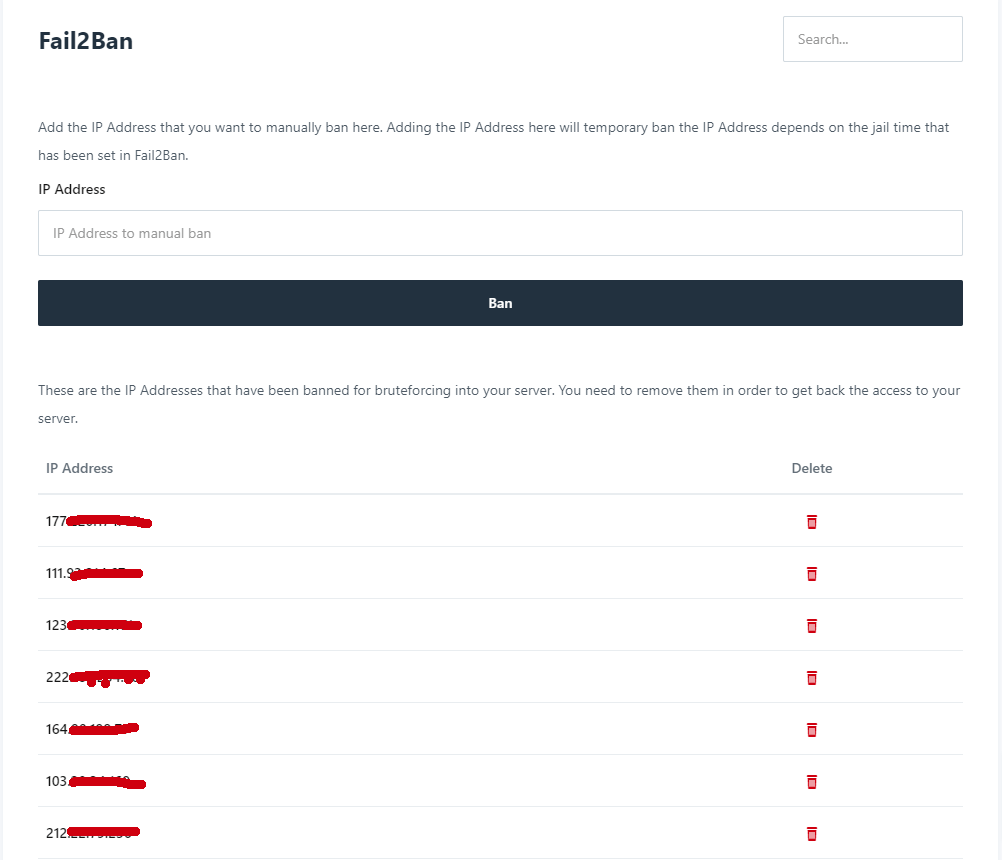
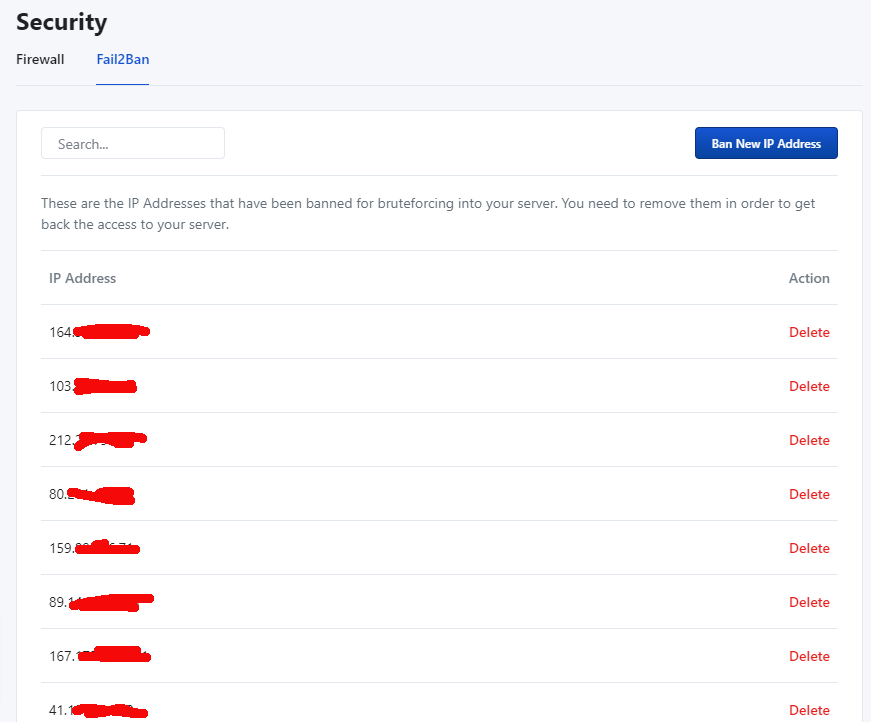
    If you scroll down further on the security page or go to the fail2ban tab on the runcloud new interface, you will see a lot of IP addresses in the list depending on how popular your site is with attackers. 🙂

    fail2ban in runcloud with a list of blocked IP addresses
    fail2ban in runcloud with a list of blocked IP addresses in the new UI.

    Most of the attackers or bots just scan the default ssh port 22. So, It’s a good idea to change the ssh port to something else.

    How to change ssh port in your Linux server

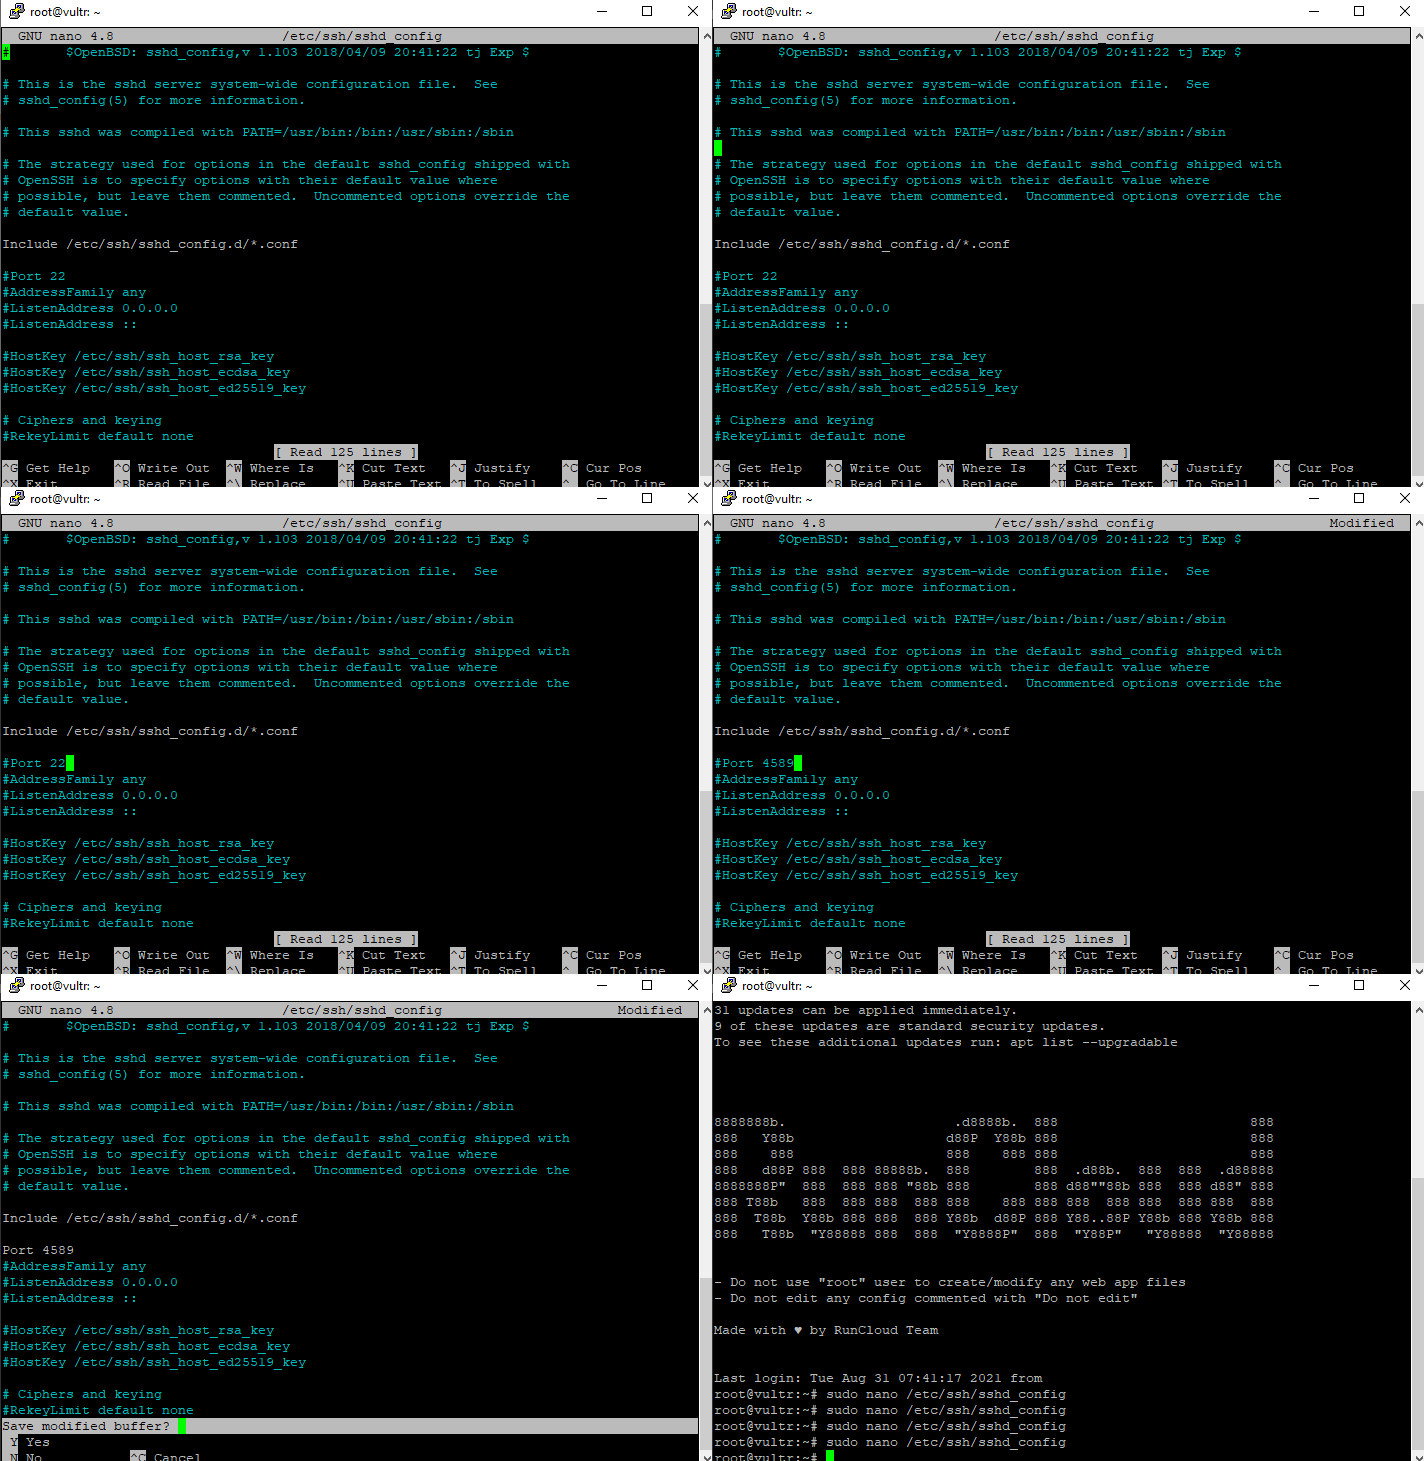
    1. Run the following command to edit sshd config file and change the port number
      sudo nano /etc/ssh/sshd_config

    2. Go to #Port 22 section and change the port number. You will have to remove the hash(#) symbol as well, to uncomment it. And then save the file.

    3. Next, you will have to restart the SSHD daemon by the following command : sudo service sshd restart

    How to configure fail2ban to secure the new custom port instead of default ssh port 22

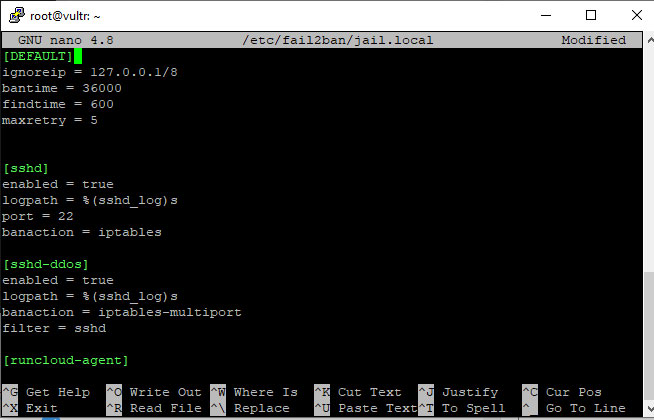
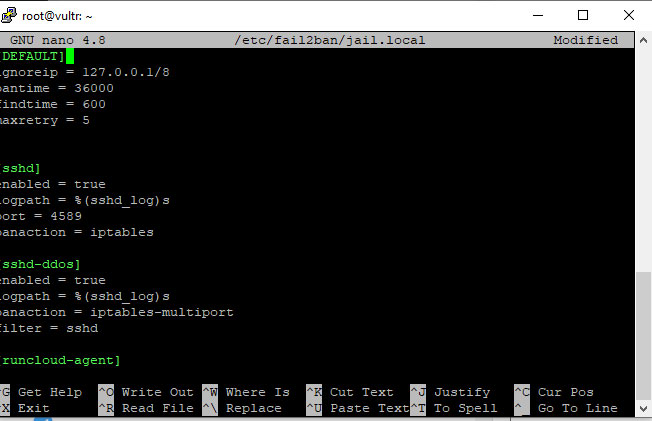
    1. Edit the fail2ban jail.local file using the following command : sudo nano /etc/fail2ban/jail.local

    2. Now go to the SSHD section and change port number from 22 to your desired port number. Make sure that it’s the same number as your new ssh port.

    3. Now, save the file and restart with the following command : sudo service fail2ban restart

    Now, your server ssh port is changed and the new ssh port is also secured by fail2ban.