Blog

  • New Google bug may be hiding your reviews

    New Google bug may be hiding your reviews

    In the past week, many local business owners have reported a sudden drop in their Google Local Business review count. If you’ve noticed that the total number of reviews on your Google Business Profile (GBP) has decreased for no apparent reason, you’re not alone.

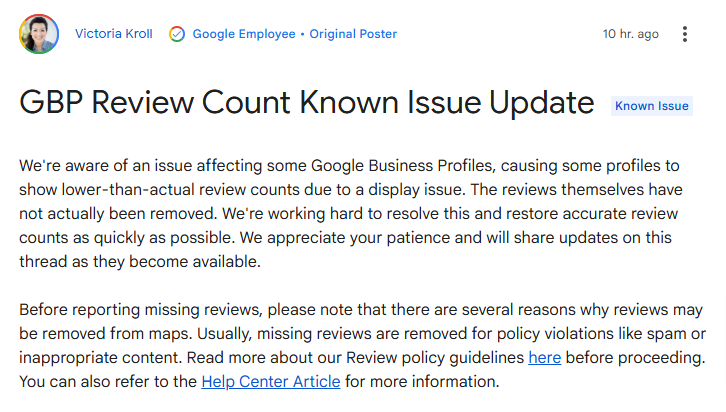
    Countless users in Google Business Profile forums are raising concerns about review counts dropping, even though their individual reviews are still visible. While Google hasn’t issued an official statement about this problem, the issue appears to be a bug that affects the display of review counts—not an actual deletion of reviews.

    What’s Causing This Issue?

    The problem lies in how Google Local Business review counts are being displayed. Business owners are reporting that the review count has dropped from a higher number to a much lower one, even though the individual reviews themselves are still intact.

    Key Facts:

    • Your reviews aren’t deleted—the count shown on your Google Local Business profile is simply incorrect.
    • No official response from Google has been released yet.
    • Widespread issue: Reports of this bug are coming from various industries and regions, indicating that it’s not an isolated problem.
    • Forums are buzzing: Business owners are flooding Google Business Profile forums to share their experiences and seek answers.
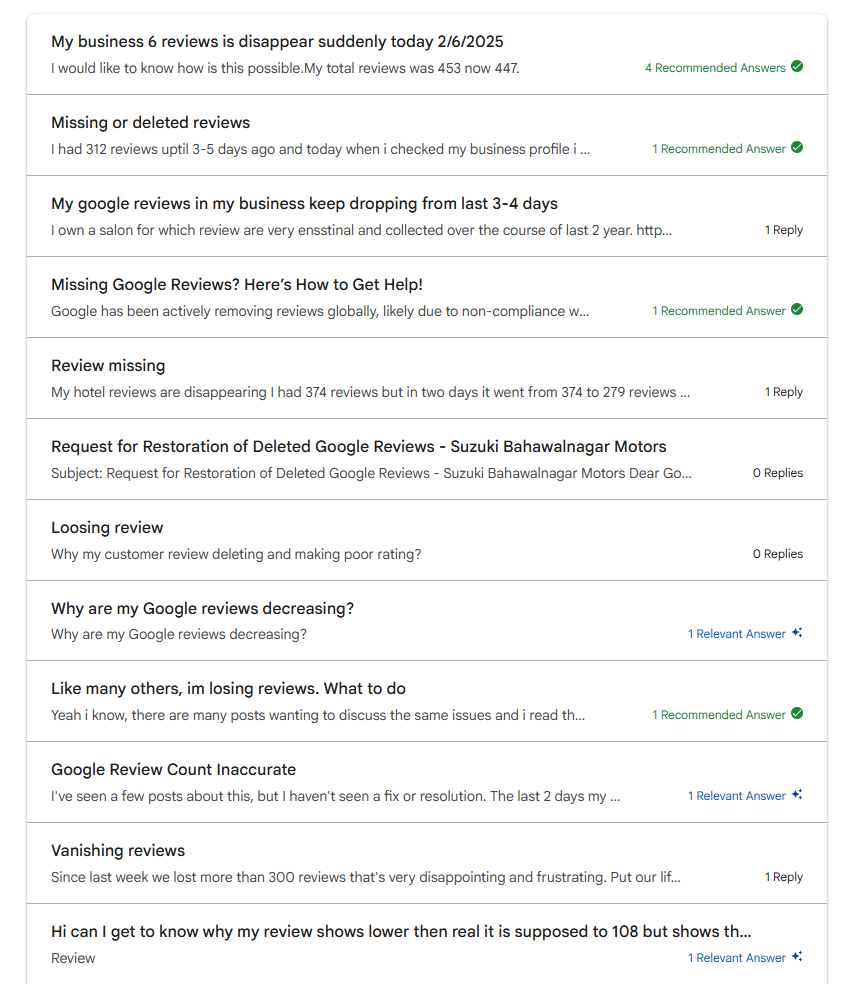
    google business profile forum is buzzing with missing reviews issue

    What If It’s Not a Count Issue?

    If you verify your Google Local Business reviews and discover that it’s not just a count display error—but that some reviews are genuinely missing—you’ll need to take immediate action.

    You can visit the official Google Business Support page and request assistance from Google. They can help investigate and potentially recover the missing reviews.

    How Can This Impact Your Business?

    1. Customer Perception and Trust

    A lower review count can lead customers to question your credibility. Even if all your reviews are still visible, the incorrect count can raise doubts. If reviews are genuinely missing, it can be even more damaging.

    2. SEO Rankings and Local Search Visibility

    Google Local Business reviews are a critical part of your local SEO strategy. A drop in review count—or worse, actual missing reviews—could affect your rankings and visibility in local search results.

    3. Reputation Concerns

    Customers may assume that reviews were removed due to negative incidents. This can harm your business’s reputation and raise unnecessary concerns.

    What Should You Do Now?

    Here’s how you can handle this situation:

    1. Check and Verify

    Manually review your Google Local Business profile to confirm whether the issue is just a count display error or if reviews are genuinely missing.

    2. Document and Monitor

    Take screenshots of your current review count and any changes. This documentation will be useful if you need to escalate the issue with Google Support.

    3. Stay Updated

    Follow Google’s official channels and Google Business Profile forums for updates. These forums are often the first place where business owners report issues and where Google representatives share information.

    4. Contact Google Support

    If you find that your reviews are genuinely missing, visit this link to request help from Google. Be sure to provide details about your business, the missing reviews, and any supporting documentation.

    5. Focus on Multi-Channel Reputation Management

    While Google resolves the issue, increase your presence on other review platforms like Yelp, Facebook, and Trustpilot. This will help protect your online reputation and ensure customers can still find positive feedback about your business.

    Final Thoughts

    Google Local Business reviews are vital for building trust, enhancing your local SEO, and attracting new customers. While this recent bug is frustrating, it’s important to stay calm and proactive. If it’s just a display error, your reviews are safe. But if you discover that reviews are genuinely missing, don’t hesitate to contact Google Support for help.

    If you need assistance with managing your online reputation or boosting your local SEO, reach out to our team at wp24x7.com. We’re here to help you navigate these challenges and grow your business’s online presence.
     

  • How to block PetalBot using Cloudflare

    How to block PetalBot using Cloudflare

    PetalBot is a website crawling bot of the Petal search engine. I have recently noticed in one of the news websites that I manage started getting a large number of requests from the bot. It kept getting worse, to the point that it started increasing the server load. So, I finally had to block the PetalBot using Cloudflare. Here is a step-by-step guide on how I did it.

    Block PetalBot using Web Application firewall :

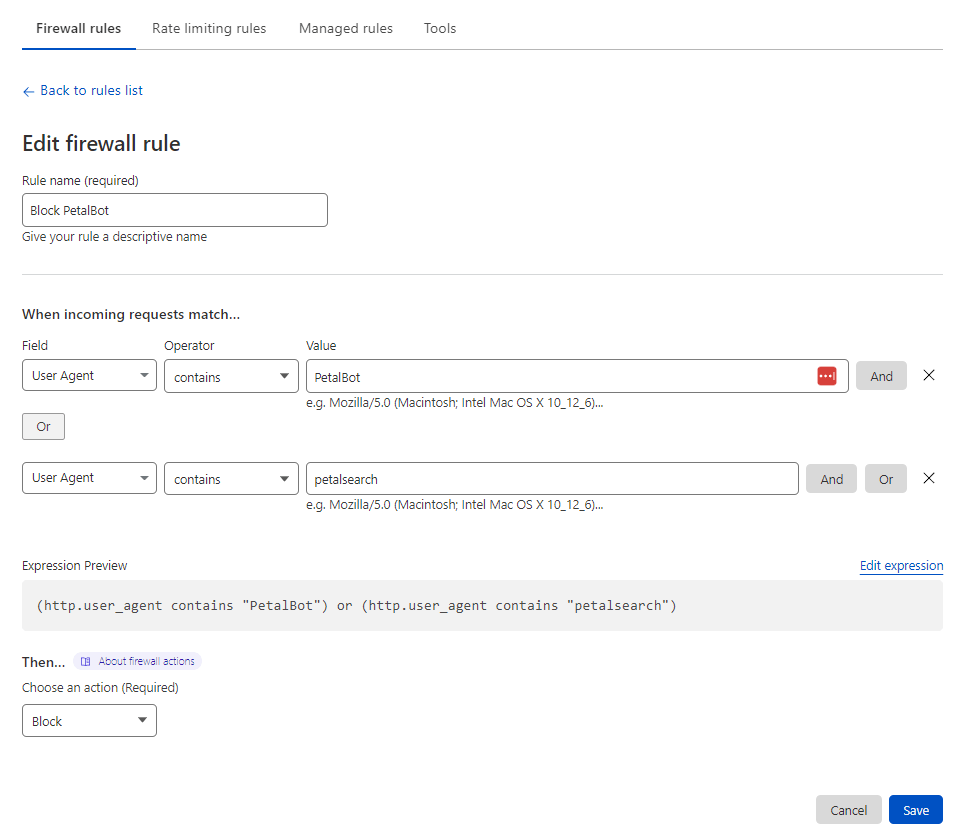
    You can go to the WAF section under security and add the following firewall rule to block any User Agent which contains the name “PetalBot“. Please check the screenshot below to understand the firewall rule.

    Cloudflare Firewall rule to block User Agent that contains, “PetalBot” or “petalsearch”
  • The best Free Anti-Spam plugin to protect your website against comment spam in 2023

    I have worked on 100s of WordPress-based websites in the last 12 years and from my experience, I can say, there is one WordPress plugin, that’s easy to set up and works wonderfully to fight against comment spam. It’s called Antispam Bee.

    Antispam Bee has minimal settings that you need to worry about, and once you have configured it, you don’t have to worry about it at all.

  • How to restore the real IP address of the visitor if your web application is behind Cloudflare

    If your web application is behind Cloudflare and you try to access the IP address of the visitor in your application, it will always show Cloudflare IP addresses, to fix this, you need to replace the Cloudflare IP address with the real IP address of the respective visitor.

    Cloudflare IP addresses :

    First of all, you need to know the IP addresses of Cloudflare.

    How to restore the real IP of the visitor in the Nginx server:

    Add the following Nginx rules to restore the real IP addresses of the visitor.

    # Cloudflare IPv4 addresses  ( IPV4 addresses that you got from https://www.cloudflare.com/ips-v4 ) 
    set_real_ip_from 173.245.48.0/20;
    set_real_ip_from 103.21.244.0/22;
    set_real_ip_from 103.22.200.0/22;
    set_real_ip_from 103.31.4.0/22;
    set_real_ip_from 141.101.64.0/18;
    set_real_ip_from 108.162.192.0/18;
    set_real_ip_from 190.93.240.0/20;
    set_real_ip_from 188.114.96.0/20;
    set_real_ip_from 197.234.240.0/22;
    set_real_ip_from 198.41.128.0/17;
    set_real_ip_from 162.158.0.0/15;
    set_real_ip_from 104.16.0.0/13;
    set_real_ip_from 104.24.0.0/14;
    set_real_ip_from 172.64.0.0/13;
    set_real_ip_from 131.0.72.0/22;
    
    # Cloudflare IPv6 addresses ( IPV6 addresses that you got from https://www.cloudflare.com/ips-v6 )
    set_real_ip_from 2400:cb00::/32;
    set_real_ip_from 2606:4700::/32;
    set_real_ip_from 2803:f800::/32;
    set_real_ip_from 2405:b500::/32;
    set_real_ip_from 2405:8100::/32;
    set_real_ip_from 2a06:98c0::/29;
    set_real_ip_from 2c0f:f248::/32;
    
    real_ip_header X-Forwarded-For;

    If you have multiple domains in a single Nginx server, then you have to make sure that the rules are applied globally on all the sites in the server or if it’s a single site, make sure that the rules are applied only for that particular web application.

  • How to fix: “WordPress 6.x.x is available! Please notify the site administrator”. or Not being able to update or delete WordPress core or the plugins.

    Go to your WordPress website’s wp-config.php file and check, if you have define( 'DISALLOW_FILE_MODS', true ); . This stops WordPress from updating any of the WordPress core files or plugin files.

    If you try to update your WordPress core, it will give an error saying, “WordPress 6.x.x is available! Please notify the site administrator“. and if you check under the plugins section, you will not find the options to update or delete the plugins, but only the option to activate or deactivate the plugins.

    Do not worry, the solution is straightforward. You have to edit the wp-config.php file and change the DISALLOW_FILE_MODS value to false. This means the code should look like this: define( 'DISALLOW_FILE_MODS', false);

  • How to fix Elementor Scheme errors: ‘Elementor\\Scheme_Typography’  & ‘Elementor\\Scheme_Color’ 

    How to fix Elementor Scheme errors: ‘Elementor\\Scheme_Typography’  & ‘Elementor\\Scheme_Color’ 

    If you have an old Elementor-based theme and you upgraded elementor recently, you may notice an error like the one below :
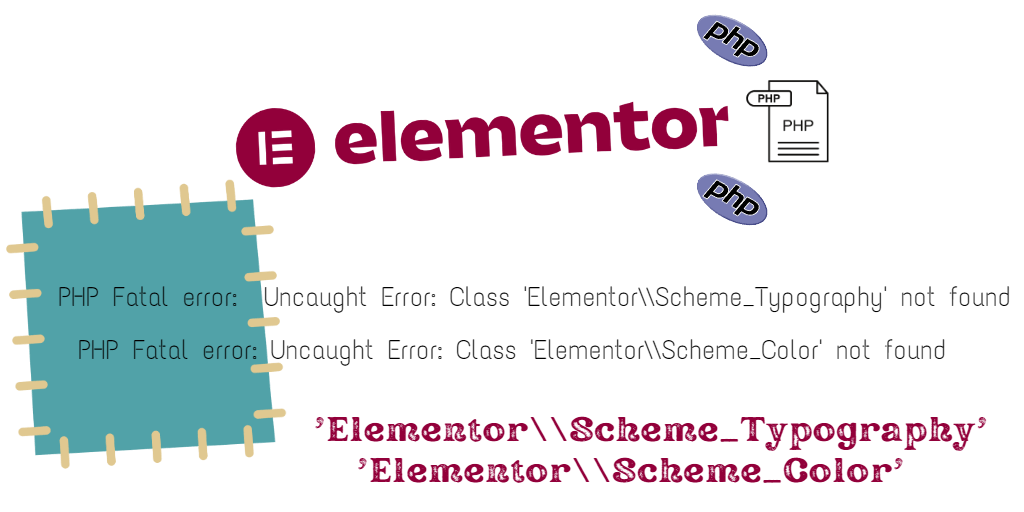
    PHP Fatal error: Uncaught Error: Class 'Elementor\\Scheme_Typography' not found

    PHP Fatal error: Uncaught Error: Class 'Elementor\\Scheme_Color' not found

    The above errors occurred because Scheme_Typography and Scheme_Color have been deprecated since elementor version 3.6.0.

    How to fix the elementor Scheme errors :

    This is not a straightforward fix. You need to get into code, and if you do not have experience, you should consider hiring a WordPress developer, to do the job.

    STEP 1: You have to first, download the plugin or theme that’s causing the error. Then, you have to do a folder search for the following: Scheme_Color:: And Scheme_Typography:: to find out a list of all instances of the code that is causing the error.

    STEP 2: You should replace all references of Scheme_Color with \Elementor\Core\Schemes\Color and Scheme_Typography with \Elementor\Core\Schemes\Typography.

    Here are two examples given below.

    /*** Example 1  ***/
    
    //Old Code 
    //'type' => Scheme_Color::get_type(),
    //'value' => Scheme_Color::COLOR_1,
    
    // New Code 
    'type' => \Elementor\Core\Schemes\Color::get_type(),
    'value' => \Elementor\Core\Schemes\Color::COLOR_1,
    
    
    /*** Example 2 ***/
    
    //Old Code 
    //'scheme' => Scheme_Typography::TYPOGRAPHY_1,
    
    // New Code 
    'scheme' => \Elementor\Core\Schemes\Typography::TYPOGRAPHY_1,


  • How to display product price using shortcode

    Here is the code snippet that you can use to create a shortcode and use it in any of your posts or pages to display the price of a specific product. You just have to specify the woocommerce product ID of that product like the given example. [woo_product_price id=20]

    function wptips_woo_price_shortcode( $atts ) {
        $atts = shortcode_atts( array(
            'id' => null,
        ), $atts, 'woocommerce_price' );
    
        $html = '';
    
        if( intval( $atts['id'] ) > 0 && function_exists( 'wc_get_product' ) ){
             $_product = wc_get_product( $atts['id'] );
             $html = $_product->get_price();
        }
        return $html;
    }
    add_shortcode( 'woo_product_price', 'wptips_woo_price_shortcode' );
  • How to reset WordPress installation

    While developing a WordPress website, we sometimes, end up doing some mistakes, or doing specific customization, which we want to erase completely, and RESET the WordPress site back to default data.

    We can achieve this in the following ways :

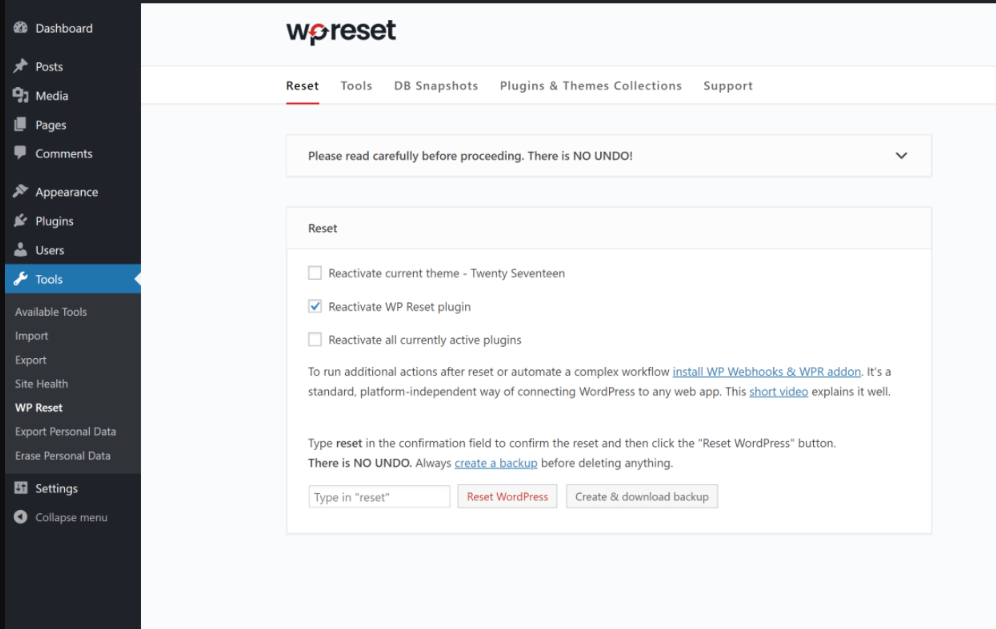
    1. Easy Way ( using a plugin ): The easiest way to reset WordPress installation is by using WP RESET plugin.

    You just have to install this plugin and go to TOOLS – WP RESET

    When you hit reset, it would ask you to confirm if you would like to continue, once you say Yes. It will reset the database and files and everything back to default settings and data.

    2. Hard Way ( manually ): If you are a developer yourself, you might want to do this manually. Simply follow these steps to reset WordPress to default manually.

    Step 1 – Go to FTP or File Manager and delete all files in the wp-content -> WP UPLOADS folder.

    Step 2 – Go to database manager or PHPMyadmin, and drop all the tables in the database connected to the WordPress installation.

    Step 3 – Visit the website URL, and it would prompt you to do a fresh WordPress installation, you can follow the steps and create a clean and new WordPress site.

  • How to show or hide ACF field based on Woocommerce order status

    You may want to show different Advanced Custom Field group based on status of your Woocommerce order status. Here we discuss the steps you can take to achieve this easily. You should know two basic things before we get started.

    Woocommerce Order status types :

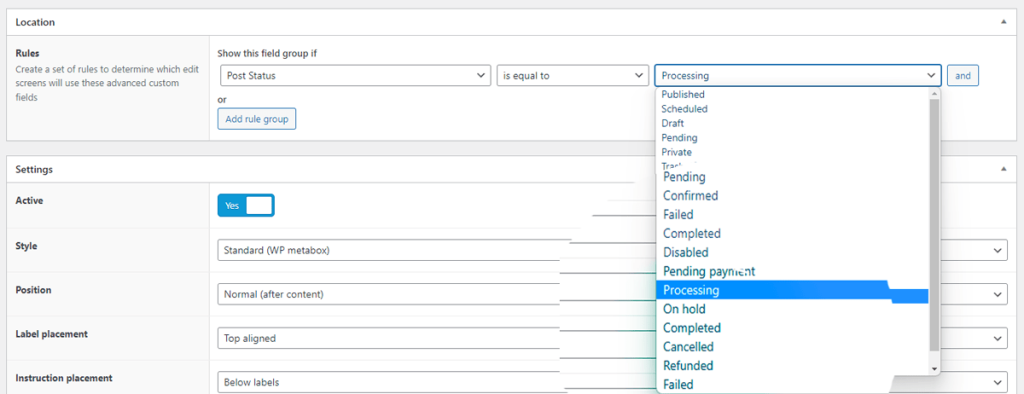
    Woocommerce orders are a custom post type and order status types are simply the post status types of post type order. For the default post type, the main post status types are “published”, “future”, “draft”, “pending”and “trash”.

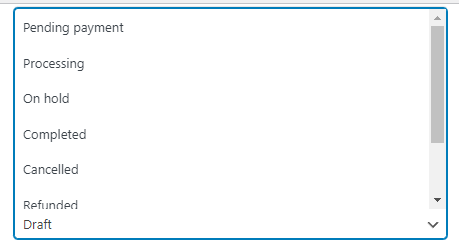
    But for Woocommerce order post type, the status types are the following : “Pending Payment”, “Processing”, “On hold”, “Completed”, “Cancelled”, “Refunded”, “Failed” and “Draft”.

    Woocommerce Order Status Types

    ACF feature to show or hide custom field group based on status type :

    ACF location

    If you edit your ACF field group, you will see Location section which allows you to set rules to show or hide your custom field group. We will use this feature to show or hide a field group from Woocommerce orders.

    STEPS to show or hide ACF field based on Woocommerce order status

    STEP 1 : Click on edit for your ACF field group and in the edit screen. go to Location section.

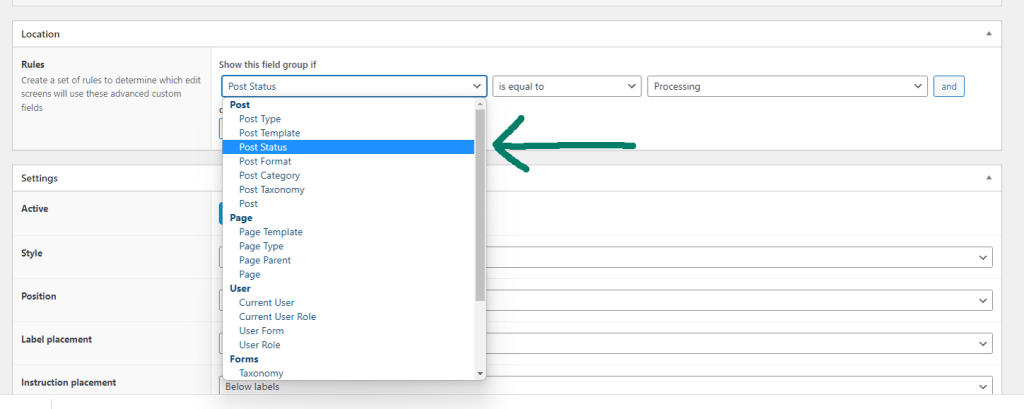
    STEP 2 : Select Post Status under post from the first dropdown.

    Select from Woocommerce Status Types

    STEP 3: Select your desired Woocommerce order status from the last dropdown and click update.

    That’s it, you are done. and now you will have your field group to show on the order edit screen based on your order status. 🙂

    If you have any question please feel free to contact via the comment form below, i reply to all queries. You can also contact me via the contact page form.

  • How to add the | and ~ separator options back in Yoast SEO plugin

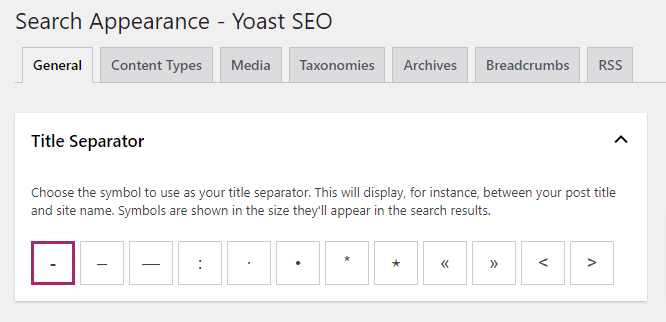
    The pipe ( | ) and tilde ( ~ ) separator options for the title have been removed from Yoast SEO plugin version 17.1. As per Yoast, It was done because Google frequently replaces these symbols in search results. For more details, please visit the changelog of the Yoast SEO plugin version 17.1 https://yoast.com/yoast-seo-17-1/

    Yoast SEO plugin version 17.1 options page without | and ~ separators

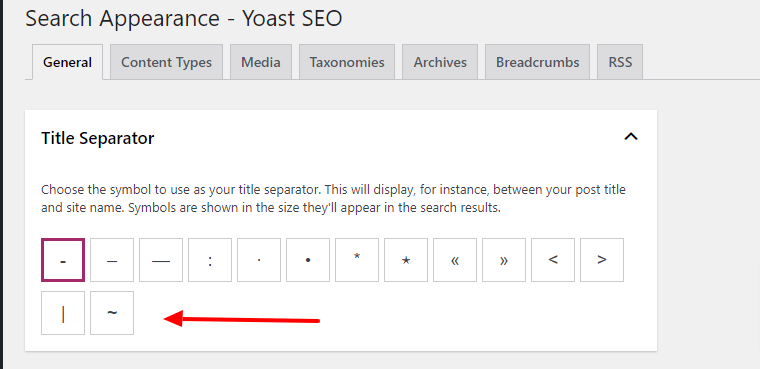
    If you want to add these separators back in your site title, then you can follow the instructions below.

    Coding method:

    Here is how it will look after adding the | and ~ separators in option page

    Copy and paste the following code snippet in your active theme’s functions.php file :

    function wptips_add_old_separators($separators){
    			$separators['sc-pipe']   = array(
    				'option' => '|',
    				'label'  => __( 'Vertical bar', 'wordpress-seo' ),
    			);
    			$separators['sc-tilde']  = array(
    				'option' => '~',
    				'label'  => __( 'Small tilde', 'wordpress-seo' ),
    			);
    	return $separators;
    }
    add_filter('wpseo_separator_option_list', 'wptips_add_old_separators');

    Non-coding method:

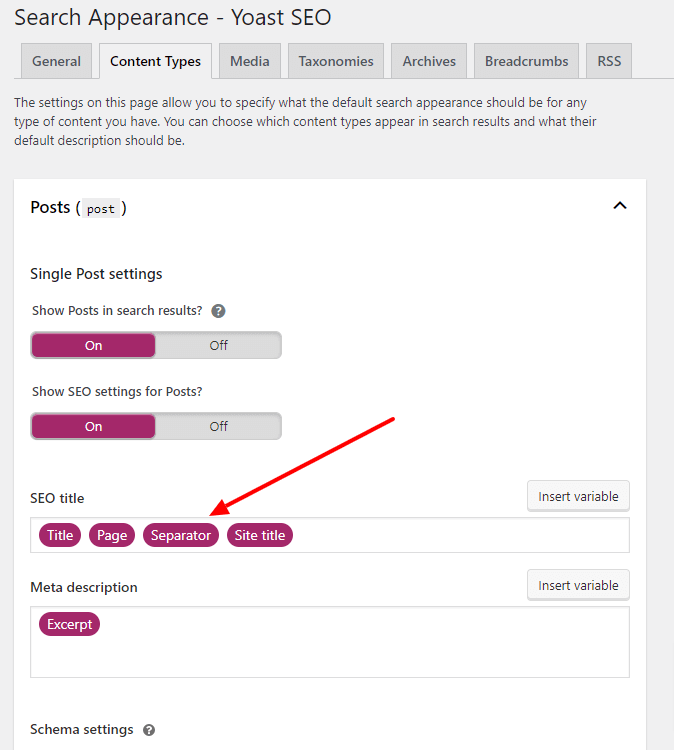
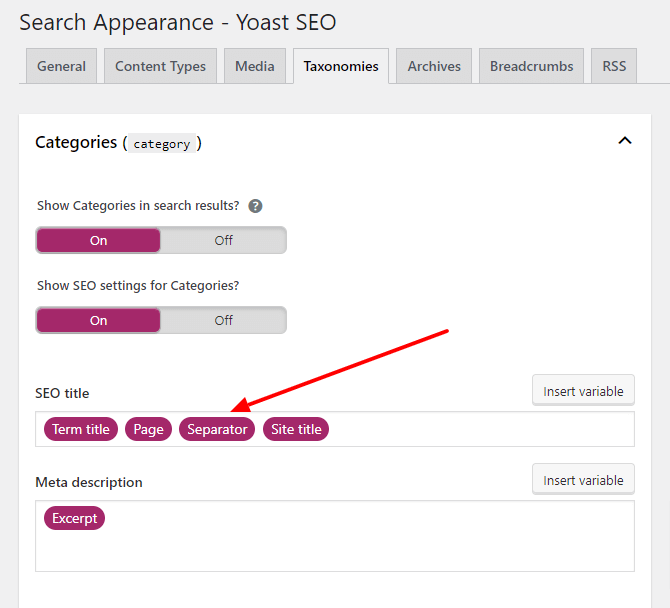
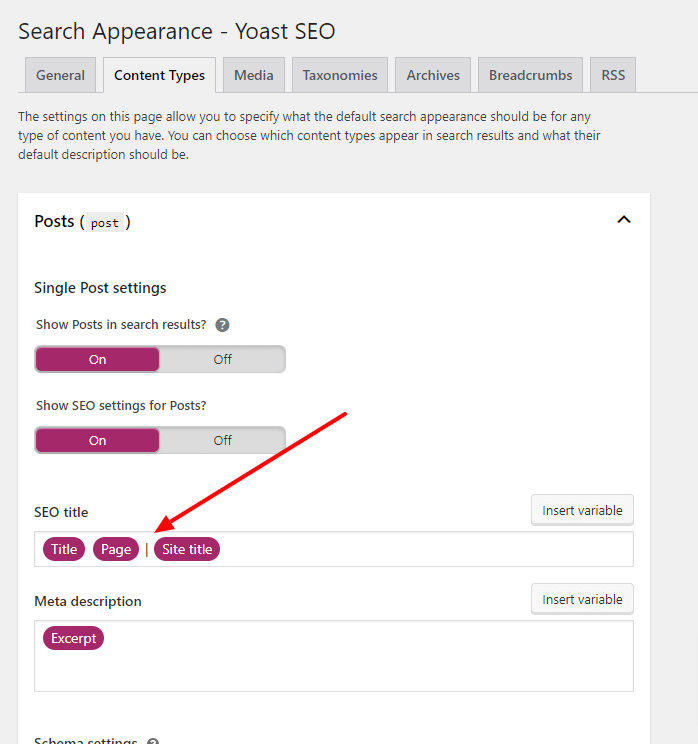
    You can add the pipe and tide symbol directly in the Yoast SEO page, post, or custom post title template section and add the symbols directly there.

    1. Under SEO, Go to Search Appearance section.

    2. Now under the Posts, Pages, Taxonomy, or custom post type section, you can replace the separator variable with the symbol you would like to insert as the given image below.

    3. You can do it in all the post types that you have on your site and click save, that’s it. You are done. No need to change anything in the code 🙂

    Thanks to Niall Flynn for suggesting this non-coding solution in the comment section.

    Let me know if you face any issues. You can comment below with your question or issue details.