Tag: RunCloud

  • How to change ssh port and secure it by fail2ban in Linux server

    How to change ssh port and secure it by fail2ban in Linux server

    I use runcloud to manage most of my Linux servers, so i have given screenshots of runcloud servers. But you can follow the steps to achieve the same in any Linux server.

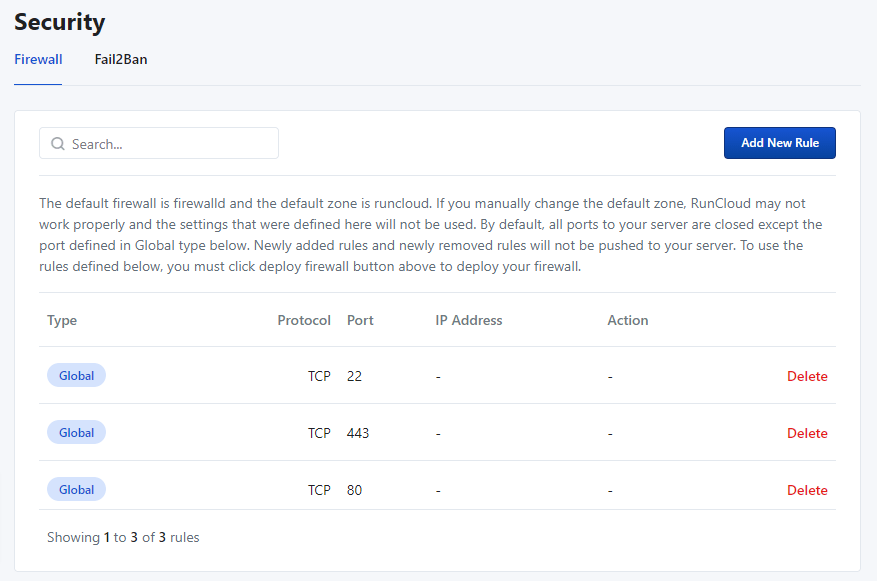
    By default, runcloud has ports 22 (ssh), 80(HTTP), and 443(HTTPS) open, and port 22 is secured by the fail2ban application.
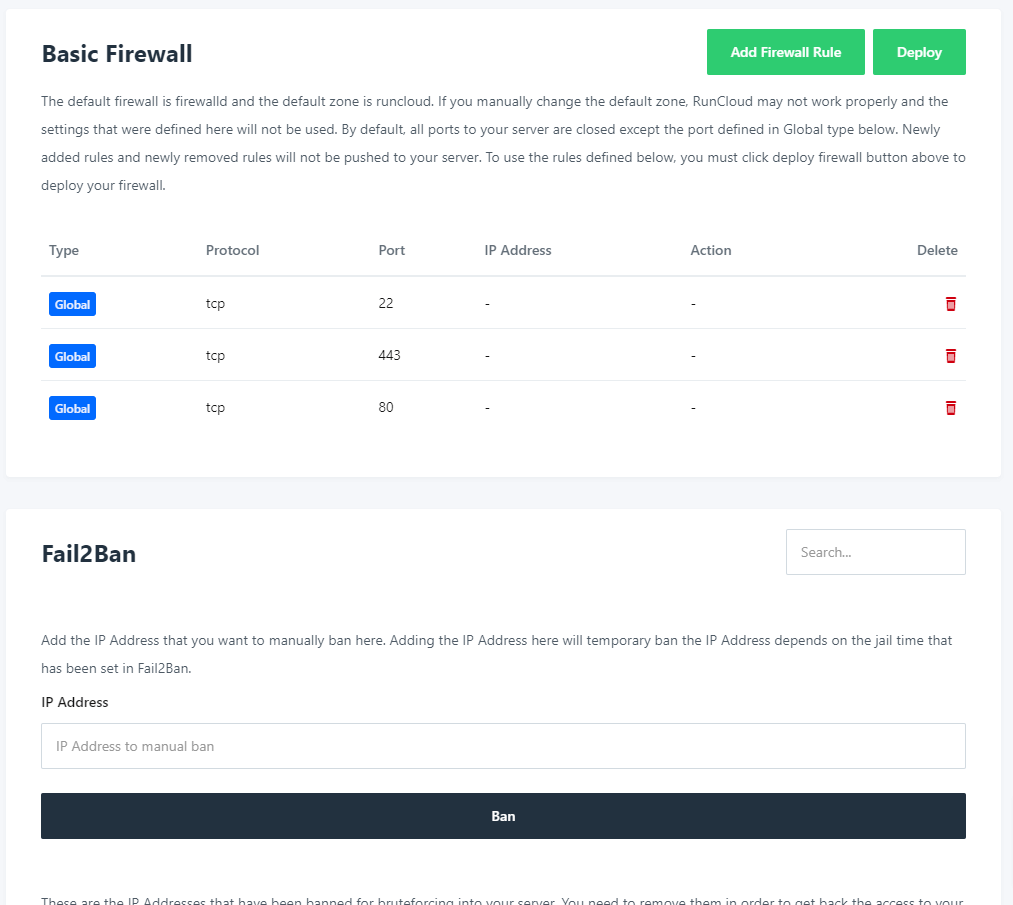
    Runcloud Firewall Settings in old UI
    Runcloud Firewall Settings in new UI interface

    If you scroll down further on the security page or go to the fail2ban tab on the runcloud new interface, you will see a lot of IP addresses in the list depending on how popular your site is with attackers. 🙂
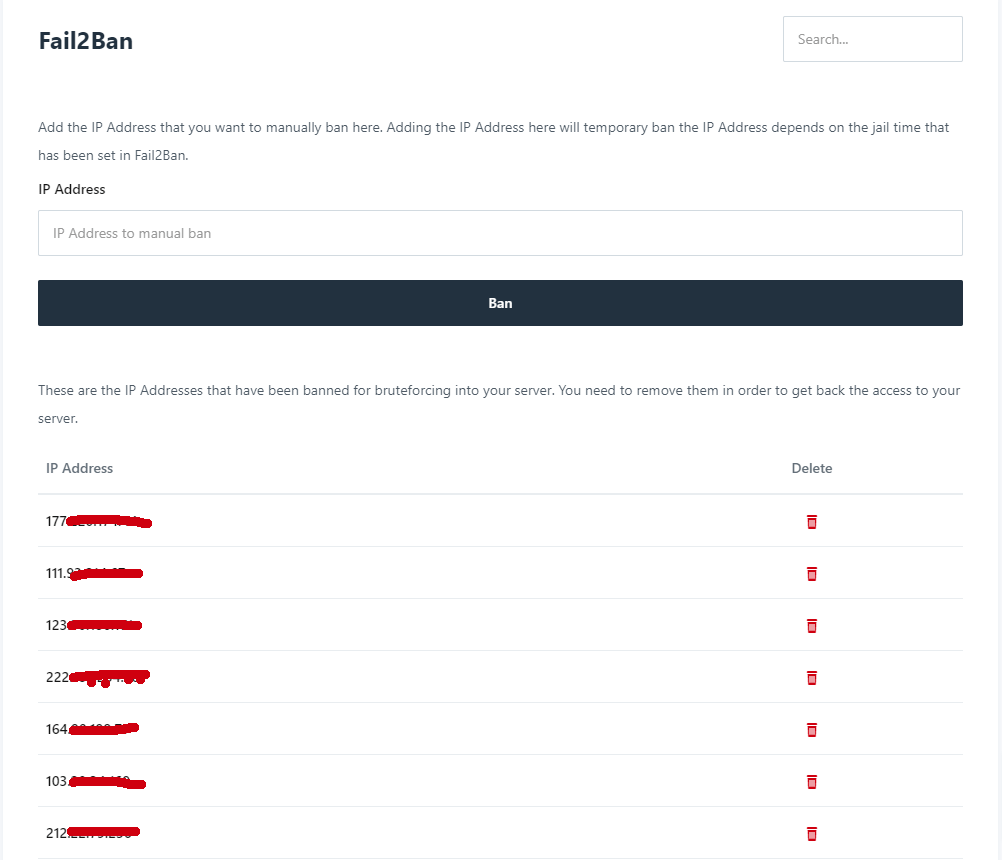
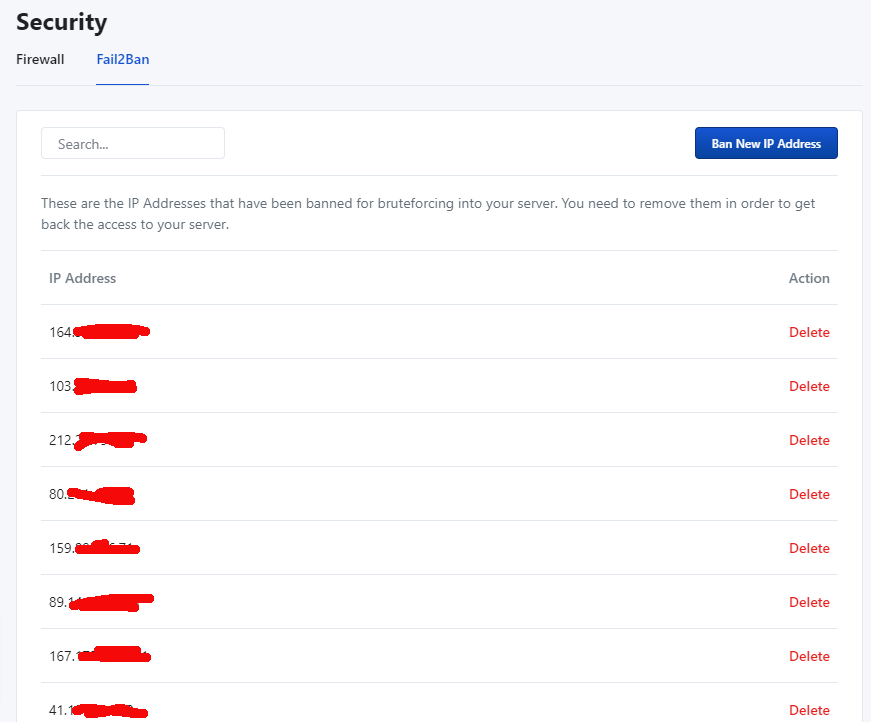
    fail2ban in runcloud with a list of blocked IP addresses
    fail2ban in runcloud with a list of blocked IP addresses in the new UI.

    Most of the attackers or bots just scan the default ssh port 22. So, It’s a good idea to change the ssh port to something else.

    How to change ssh port in your Linux server

    1. Run the following command to edit sshd config file and change the port number
      sudo nano /etc/ssh/sshd_config
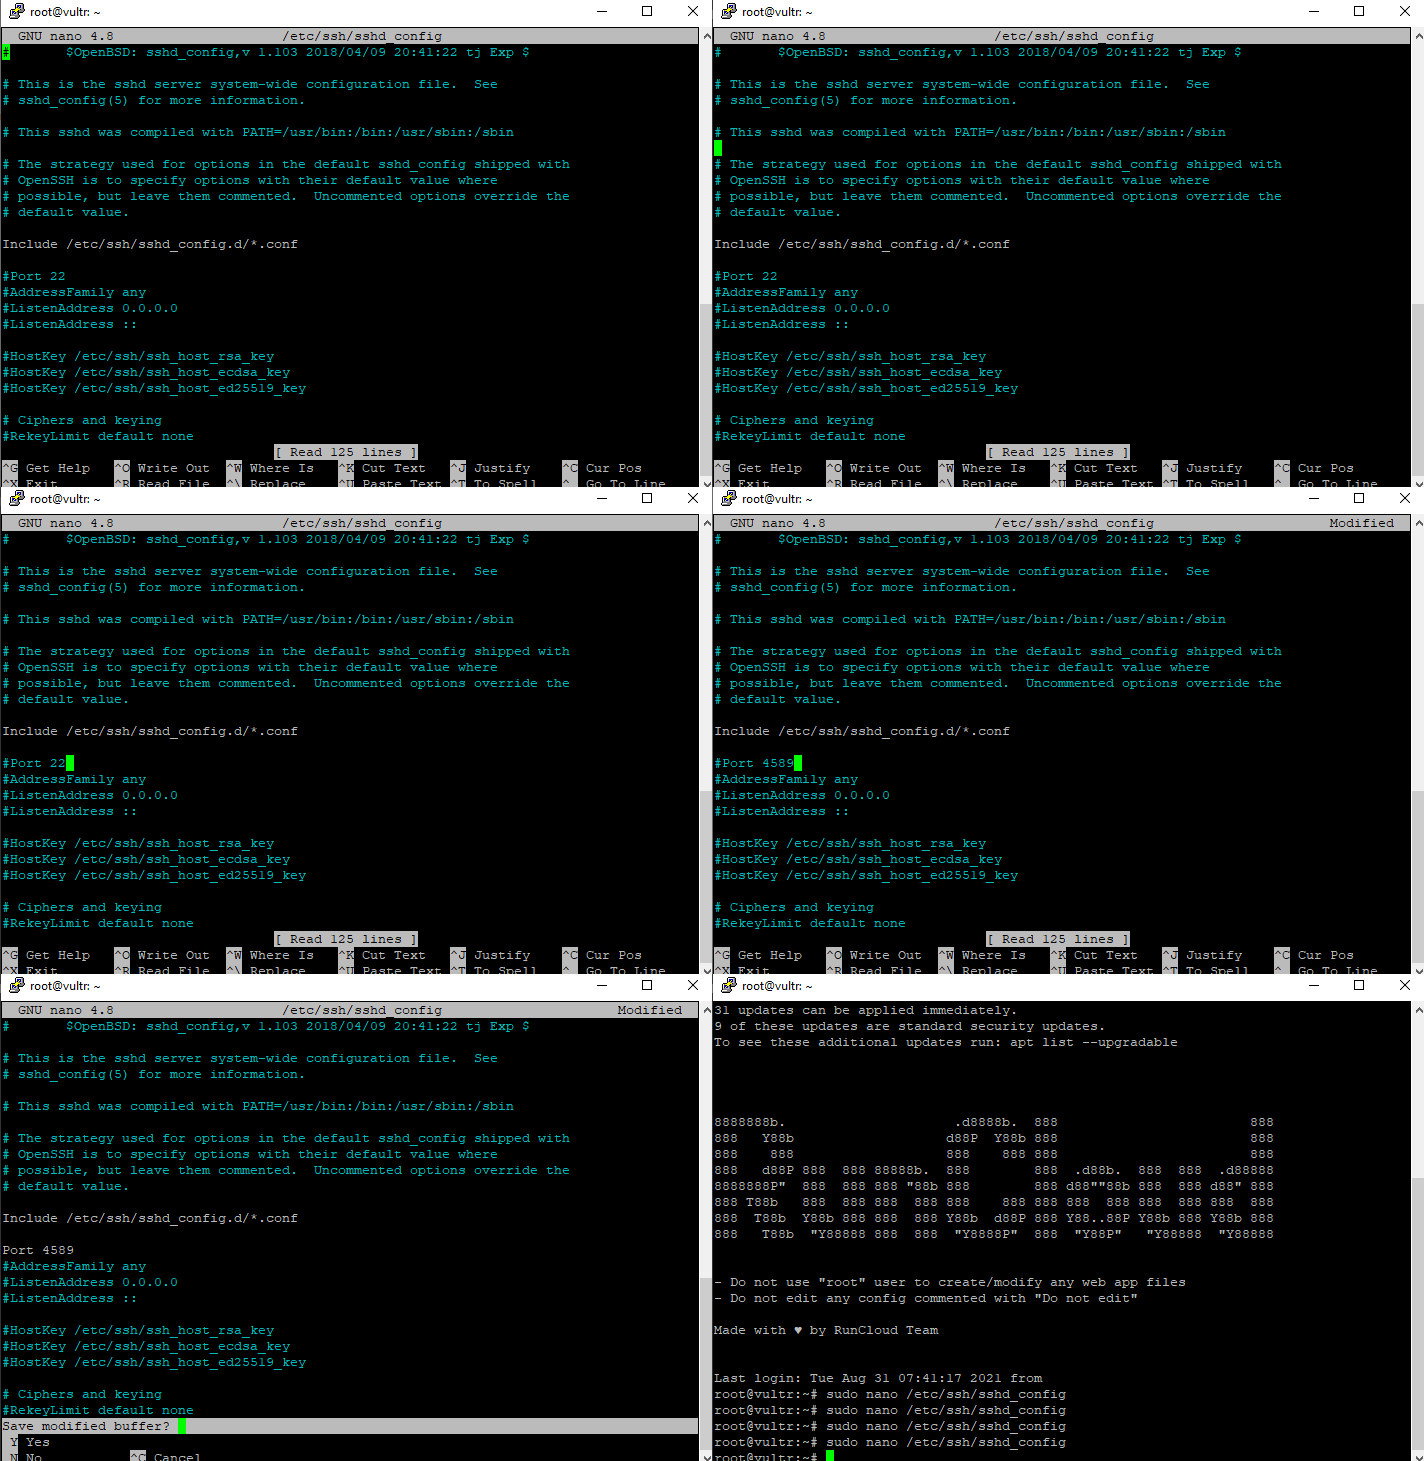
    2. Go to #Port 22 section and change the port number. You will have to remove the hash(#) symbol as well, to uncomment it. And then save the file.

    3. Next, you will have to restart the SSHD daemon by the following command : sudo service sshd restart

    How to configure fail2ban to secure the new custom port instead of default ssh port 22

    1. Edit the fail2ban jail.local file using the following command : sudo nano /etc/fail2ban/jail.local
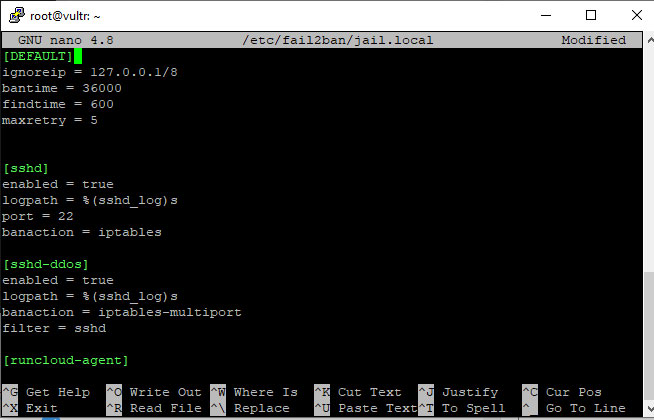
    2. Now go to the SSHD section and change port number from 22 to your desired port number. Make sure that it’s the same number as your new ssh port.
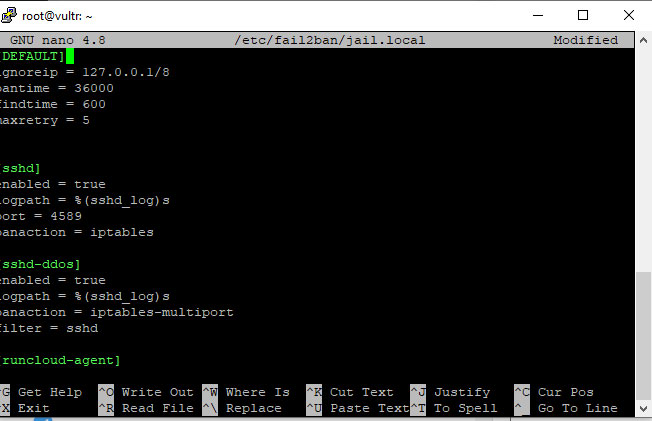
    3. Now, save the file and restart with the following command : sudo service fail2ban restart

    Now, your server ssh port is changed and the new ssh port is also secured by fail2ban.
  • How to serve WebP images dynamically in RunCloud using EWWW Image Optimizer plugin

    You can use EWWW Image Optimizer plugin to serve WebP images on your website. But you will have to implement some Nginx configurations in your RunCloud server to be able to achieve it. Follow the instructions below.

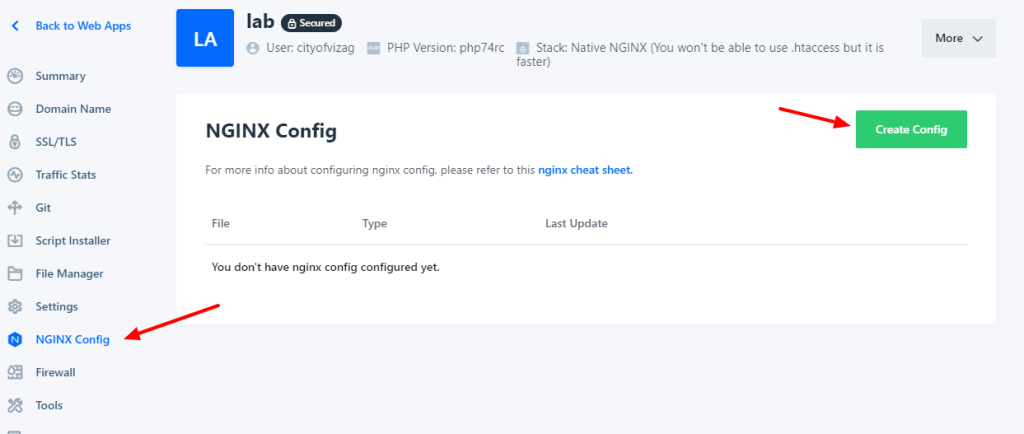
    1. Select your server and go to the Web Application page that you want to implement the WebP configuration to. Now go to NGINX Config section and click Create Config button to add new configuration.

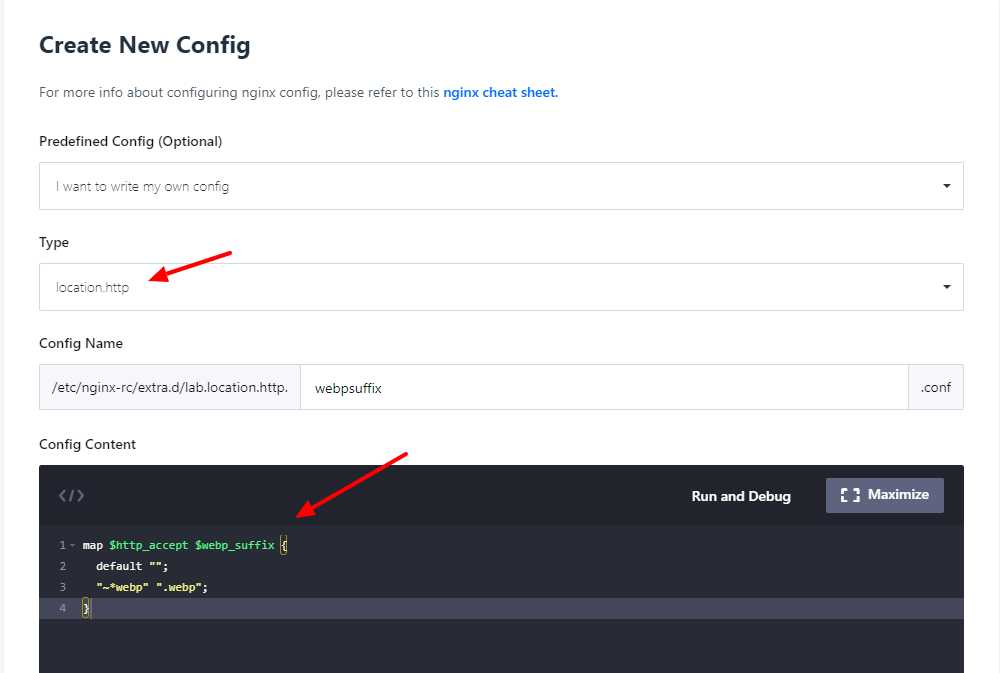
    2. Now, we have to add two configuration blocks. The first one is a map directive to http config and to add this click on Create Config and select “I want to write my own config” and then, select “location.http” under Type dropdown. Then, give the file a name and add the Nginx map code given below.

    map $http_accept $webp_suffix {
      default "";
      "~*webp" ".webp";
    }

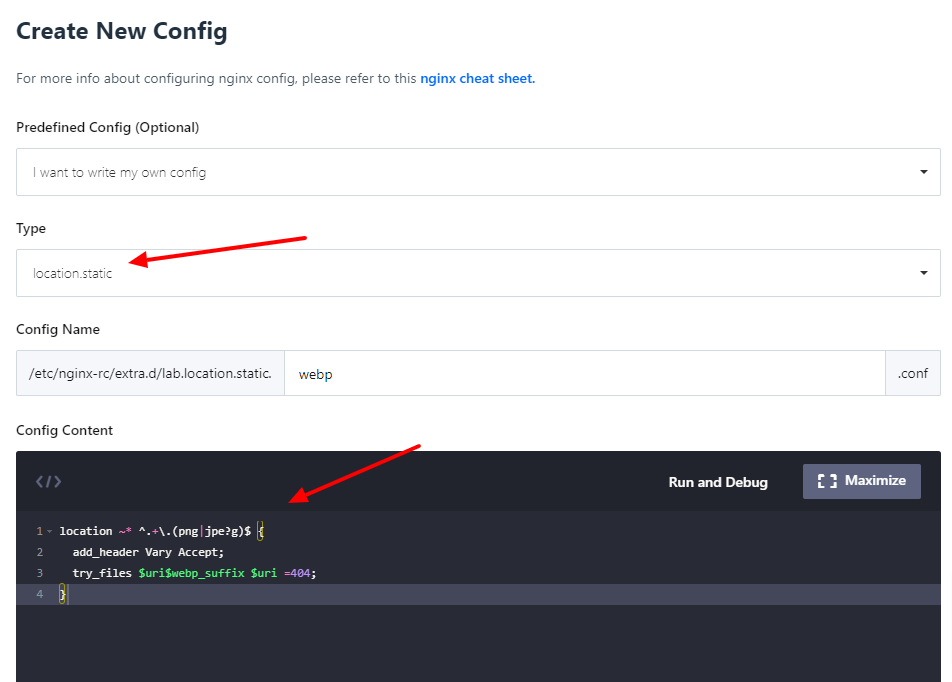
    3. Now, we have to add a location block to handle PNG and JPG images that might have WebP versions available on the server. Now, click on Create Config again and this time select type as “location.static” because the image files are static files, and it includes it in the server block only.

    Next, give it a name and add the following code.

    location ~* ^.+\.(png|jpe?g)$ {
      add_header Vary Accept;
      try_files $uri$webp_suffix $uri =404;
    }

    That’s it, now you have to make sure that you have EWWW Image Optimizer or any other WebP conversion plugin set up on the site and for every JPG or PNG file, you have its WebP version of the file available in the same directory.

    Feel free to ask any questions in the comment section. I would be very happy to help you. If you are looking for professional help with improving the speed of your website, then visit WordPress Speed Optimization Service by wpboys.

    Note: you can view EWWW Image Optimizer plugin documentation in this URL to know more about Nginx configuration set up https://docs.ewww.io/article/16-ewww-io-and-webp-images